Tutorials
Learn how to use the APIs to accomplish common tasks in Keyavi. Topics include:
Protect a File Remotely
In this tutorial, you'll learn how to protect![]() The process of encrypting a file and tying access policies to it so that authorized users can access the data securely based on restrictions set by the data owner. a file remotely and save it as a protected .IKD file
The process of encrypting a file and tying access policies to it so that authorized users can access the data securely based on restrictions set by the data owner. a file remotely and save it as a protected .IKD file![]() Short for "Intelligent Keyavi Data" and is the file extension for a Keyavi-protected file. This file has multiple layers of encryption and policy-based rulesets infused into the data itself, making it self-protecting, intelligent, and self-aware.. You will create a Keyavi payload
Short for "Intelligent Keyavi Data" and is the file extension for a Keyavi-protected file. This file has multiple layers of encryption and policy-based rulesets infused into the data itself, making it self-protecting, intelligent, and self-aware.. You will create a Keyavi payload![]() A database entry that carries metadata, access rules, and codes to make possible the protection and controlled sharing of data by authorized users according to the data owner's policies. Payloads enable granular data protection without moving data outside the organization's control. and acquire the information needed to create a Keyavi-protected .IKD file. Because you are the file owner, only you will be able to open
A database entry that carries metadata, access rules, and codes to make possible the protection and controlled sharing of data by authorized users according to the data owner's policies. Payloads enable granular data protection without moving data outside the organization's control. and acquire the information needed to create a Keyavi-protected .IKD file. Because you are the file owner, only you will be able to open![]() The process of decrypting a protected, encrypted file and transforming it back into its original, accessible form for authorized users based on policies set for that file. it. The next tutorial will explain how to add authorized users.
The process of decrypting a protected, encrypted file and transforming it back into its original, accessible form for authorized users based on policies set for that file. it. The next tutorial will explain how to add authorized users.
We will cover:
-
Encoding a file to Base64.
-
Submitting a
POST protect-remoterequest to create a payload. -
Decoding and saving the .IKD file.
-
Encode the file as Base64.
You can use scripts or online resources to encode a file. For this tutorial, we're going to use a PowerShell script to encode this Protect-remote text file. Download the file to your machine and update the file path in the example below.
Copy[System.Convert]::ToBase64String([System.IO.File]::ReadAllBytes("C:\Users\UserName\Downloads\Protect-remote.txt"))Here's a truncated string of the Base64 encoded version of the file. Your Base64 string will be significantly longer, but it should start and end with the same characters.
CopyVGhlIGRp...uIDI1IE1CLg== -
Build your API call.
Create a newPOST /payloadsrequest with these components:-
Endpoint—
{{Keyavi-base-url}}/api/payloads/protect-remote/ -
Headers
-
Authorization header—
Authorization: Bearer {{Your access token}}If you don't have a token, see Authentication -
Subscription key—
Ocp-Apim-Subscription-Key: {{Your subscription key}} -
Only for client app authentication: Calling user—
x-api-caller-id: [email protected]
-
-
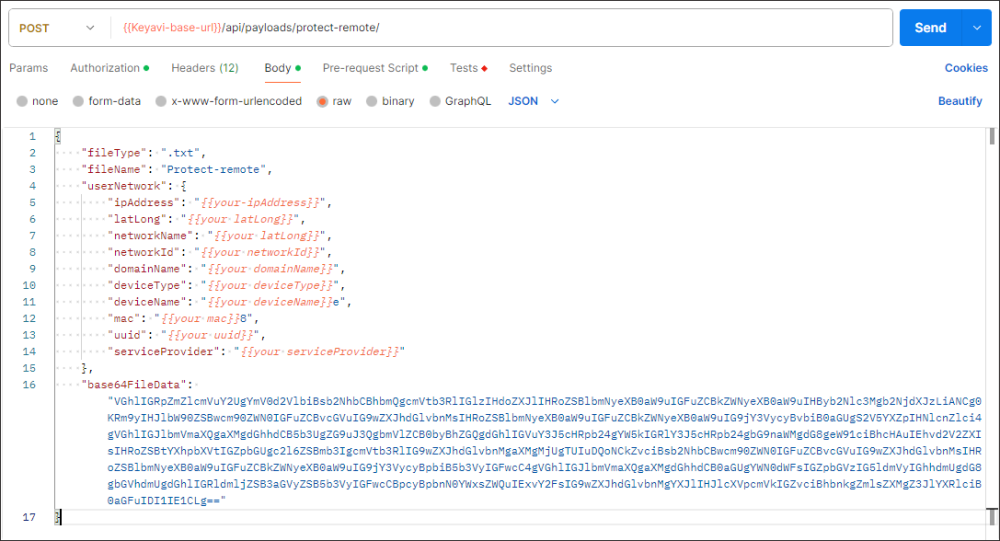
Body: Create a body request that includes the required body properties
fileType,fileName,userNetwork(ipAddress,latLong), andbase64FileData.
 Postman
 Copy
Copy{
"fileType": ".txt",
"fileName": "Protect-remote",
"userNetwork": {
"ipAddress": "{{your-ipAddress}}",
"latLong": "{{your latLong}}",
"networkName": "{{your latLong}}",
"networkId": "{{your networkId}}",
"domainName": "{{your domainName}}",
"deviceType": "{{your deviceType}}",
"deviceName": "{{your deviceName}}e",
"mac": "{{your mac}}8",
"uuid": "{{your uuid}}",
"serviceProvider": "{{your serviceProvider}}"
},
"base64FileData": "VGhlIGRp...uIDI1IE1CLg=="
}cURL
Copycurl --location '{{baseURL}}/payloads/protect-remote/' \
--header 'x-api-caller-id: [email protected]' \
--header 'Ocp-Apim-Subscription-Key: {{your subscription key}}' \
--header 'Authorization: Bearer {{your access token}}' \
--data '{
"fileType": ".txt",
"fileName": "Protect-remote",
"userNetwork": {
"ipAddress": "{{your-ipAddress}}",
"latLong": "{{your latLong}}",
"networkName": "{{your latLong}}",
"networkId": "{{your networkId}}",
"domainName": "{{your domainName}}",
"deviceType": "{{your deviceType}}",
"deviceName": "{{your deviceName}}e",
"mac": "{{your mac}}8",
"uuid": "{{your uuid}}",
"serviceProvider": "{{your serviceProvider}}"
},
"base64FileData": "VGhlIGRp...uIDI1IE1CLg=="
}' -
-
Submit the request.
The Keyavi API responds with details about the payload you created and the Base64 encoded file, which you can decode and save as a Keyavi-protected IKD file.
Copy{
"payload": {
"ownerId": "{{Your owner id}}",
"payloadId": "{{Your payload ID}}",
"fileType": ".txt",
"originalFileName": "Protect-remote",
"originalFileCreatedDate": "2024-03-08T20:47:39.19223+00:00",
"payloadCreateDate": "2024-03-08T20:47:40.2350953+00:00",
"isRevoked": false
},
"base64FileData": "AgAAAHZe...41RVV9Jdqi"
} -
Decode the Base64 string to a Keyavi-protected .IKD file.
As before, you can use scripts or online resources to decode Base64 strings.
This PowerShell script will save the file as an .IKD file in the specified directory. If you use the script, update the file path to the location you would like to save it to.
Copy[System.IO.File]::WriteAllBytes("C:\Keyavi_Learning\Tutorials\Protect-remote.ikd",[byte[]][convert]::FromBase64String("AgAAAHZe...41RVV9Jdqi")) -
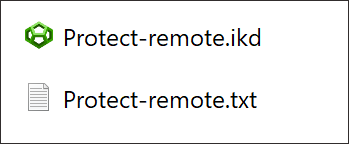
Check the directory you saved it to for the .IKD file.
If you saved it in the same directory, you will see both files.
Authorize Users for a Protected File
In this tutorial, you'll learn how to apply a policy![]() Rules associated with a protected payload that designate which users can access the encrypted file, from what locations, and for what time periods. to authorize a user to access the file. We will use the same payload from the previous tutorial.
Rules associated with a protected payload that designate which users can access the encrypted file, from what locations, and for what time periods. to authorize a user to access the file. We will use the same payload from the previous tutorial.
-
Build an API call to retrieve a list from the
usersendpoint.Create a new
GET /usersrequest.You do not need to include the
expandparameter, which returns detailed user information needed to manage users.Copycurl --location '{{baseURL}}/users' \
--header 'x-api-caller-id: [email protected]' \
--header 'Ocp-Apim-Subscription-Key: 911d38fcea034e0698c47107f12acd7d'
--header 'Authorization: Bearer {{your access token}}' \The API responds with a paginated list of users.
Copy{
"pagination": {
"totalRecords": 100,
"totalPages": 1,
"pageSize": 100,
"itemsInPage": 100,
"page": 1
},
"data": [
{
"id": "b88c71cb-b610-4045-99e7-f566c1535f44",
"firstName": "Jim",
"lastName": "Naysium",
"email": "[email protected]",
"type": "FULL"
},
...
{
"id": "2f8bed26-311d-49bc-8c56-eb18231af249",
"firstName": "Paige",
"lastName": "Turner",
"email": "[email protected]",
"type": "FULL"
}
]
} -
Identify the ids of each user that you want to authorize.
In this tutorial, we will authorize Jim and Paige.
-
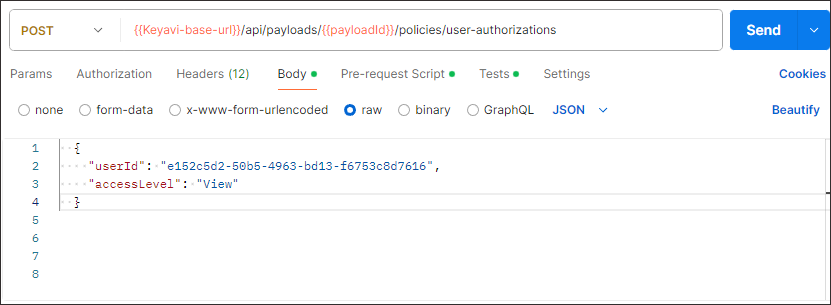
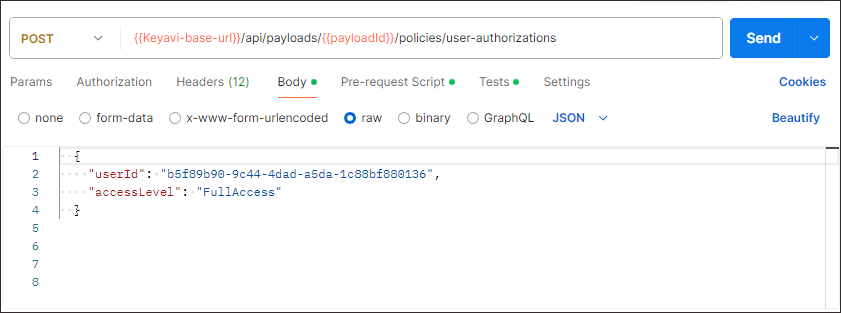
Build two API requests to authorize each user to the payload you created in the previous tutorial. You can specify an access level, so give Jim
Viewaccess and PaigeFullAccess.Create a new
POST /payloads/{payloadId}/policies/user-authorizationsrequest with these components:- Endpoint—
{{Keyavi-base-url}}/api/payloads/{payloadId}/policies/user-authorizations - payloadId path parameter—The
payloadIdof the payload that you are authorizing the users to access. -
Headers
-
Authorization header—
Authorization: Bearer {{Your access token}}If you don't have a token, see Authentication -
Subscription key—
Ocp-Apim-Subscription-Key: {{Your subscription key}} -
Only for client app authentication: Calling user—
x-api-caller-id: [email protected]
-
-
Body: Create a body request that includes the required body properties
userId, andaccessLevel).cURL
Copycurl --location '{{baseURL}}/payloads/protect-remote/' \
--header 'x-api-caller-id: [email protected]' \
--header 'Ocp-Apim-Subscription-Key: {{your subscription key}}' \
--header 'Authorization: Bearer {{your access token}}' \
--data ' {
"userId": "b88c71cb-b610-4045-99e7-f566c1535f44",
"accessLevel": "View"
}Copycurl --location '{{baseURL}}/payloads/protect-remote/' \
--header 'x-api-caller-id: [email protected]' \
--header 'Ocp-Apim-Subscription-Key: {{your subscription key}}' \
--header 'Authorization: Bearer {{your access token}}' \
--data ' {
  {
    "userId": "2f8bed26-311d-49bc-8c56-eb18231af249",
    "accessLevel": "FullAccess"
}'If successful, Keyavi returns a 200 response.
- Endpoint—
-
Confirm that the users are authorized to the payload.
Create a new
GET payloads/{payloadId}/policies/user-authorizationsrequest, using the samepayloadId.Copycurl --location '{{baseURL}}/payloads/51b3c1ae-e821-4756-a433-37b9fdef8254/policies/user-authorizations' \
--header 'x-api-caller-id: [email protected]' \
--header 'Ocp-Apim-Subscription-Key: 911d38fcea034e0698c47107f12acd7d'
--header 'Authorization: Bearer {{your access token}}' \Keyavi returns the list of authorized users.
Copy[
{
"userId": "2f8bed26-311d-49bc-8c56-eb18231af249",
"userName": "turner,paige",
"email": "[email protected]",
"accessLevel": "FullAccess",
"isRevoked": false
},
{
"userId": "b88c71cb-b610-4045-99e7-f566c1535f44",
"userName": "Naysium,Jim",
"email": "[email protected]",
"accessLevel": "View",
"isRevoked": false
}
]