Protect Files and Folders
You can protect![]() The process of encrypting a file and tying access policies to it so that authorized users can access the data securely based on restrictions set by the data owner. any data file type, either individually or in bulk folders. In addition, you can add multiple layers of encryption
The process of encrypting a file and tying access policies to it so that authorized users can access the data securely based on restrictions set by the data owner. any data file type, either individually or in bulk folders. In addition, you can add multiple layers of encryption![]() The process of protecting a file and tying access policies to it so that authorized users can access the data securely based on restrictions set by the data owner. to your data by applying policy
The process of protecting a file and tying access policies to it so that authorized users can access the data securely based on restrictions set by the data owner. to your data by applying policy![]() Rules associated with a protected payload that designate which users can access the encrypted file, from what locations, and for what time periods. rulesets. For example, as the data owner
Rules associated with a protected payload that designate which users can access the encrypted file, from what locations, and for what time periods. rulesets. For example, as the data owner![]() A user that encrypts the file with Keyavi and maintains control of that data throughout its lifecycle from the Data Management Console., you can add geolocations, grant access to users, and define access time frames
A user that encrypts the file with Keyavi and maintains control of that data throughout its lifecycle from the Data Management Console., you can add geolocations, grant access to users, and define access time frames![]() A specific window of time when access is allowed to a file. The time frames can be open-ended, so you can set just a beginning date and time or ending date and time..
A specific window of time when access is allowed to a file. The time frames can be open-ended, so you can set just a beginning date and time or ending date and time..
Protecting a file requires some free space on your device. If your device does not have enough available storage, Keyavi shows an error message. See Free Up Space or Add Additional Storage for suggestions to free up space.
Protect Files
With the Keyavi app installed on your device, you can protect files using any of these methods:
-
Open Keyavi app, click Protect. On the Protect window in Keyavi, click Select File, and then find the file you want to protect. Show me


-
Right-click a file or folder, and then select Protect with Keyavi. Show me
-
Drag a file to the Protect button in the Keyavi app. Show me
After selecting a document to protect, Keyavi shows the file on the Protect page. where you can add authorized users or groups, add access time frames, add file-level geopolicies, select more files, or protect the file so only you have access.
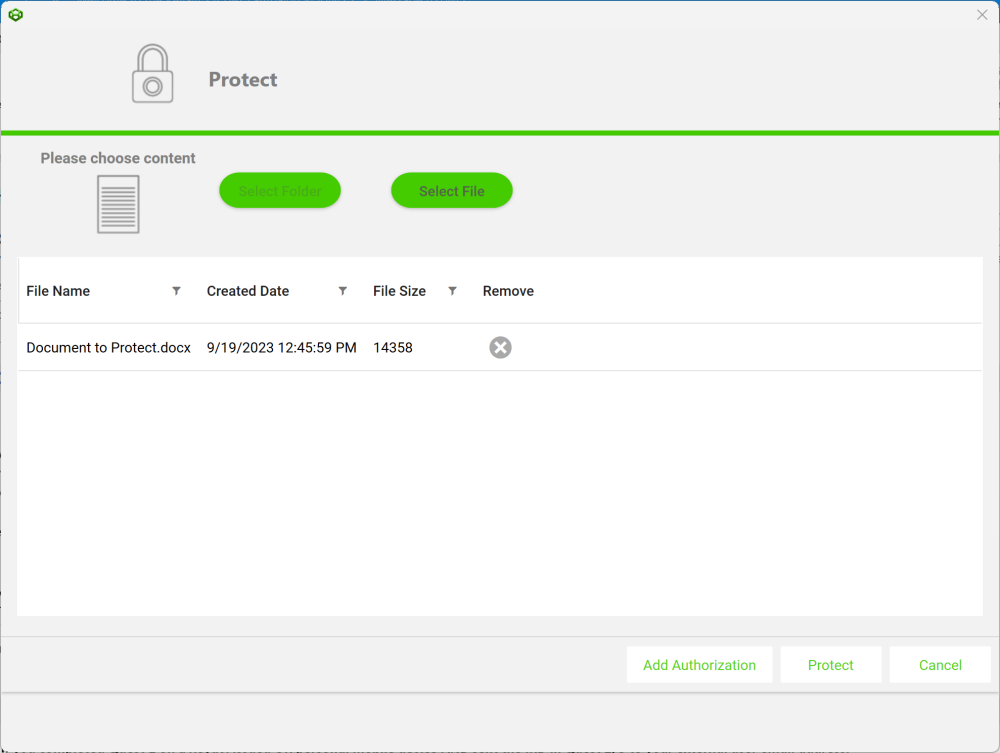
To immediately Keyavi-protect the file without applying other policies, such as adding authorized users or restricting the access period, click Protect at the bottom of the wizard. Only you (the data owner) can open the file if you don't select a user.
Add Authorized Users
Authorized users or groups define who is allowed to access the protected file. You can add authorized users while protecting the file, or later using the Keyavi Portal.
You are the data owner and always have access to the data.
To add authorized users or groups:
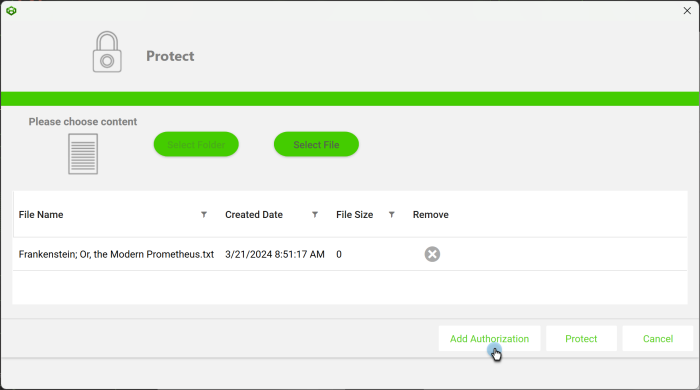
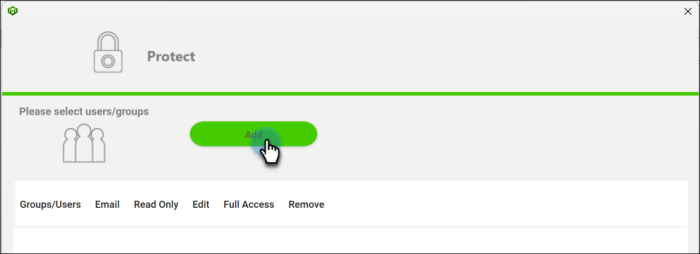
- At the bottom of the Protect window, click Add Authorization. Show me
- Click Add to open the Access Authorization window where you can add users and groups. Show me
- Use the Groups, Users, and External tabs to navigate to the different categories where you can search or browse for users and groups. Show me

- For each user or group that you want to give access to, select the access level (e.g., Read-only, Edit, or Full Access), and then click Done. Show me

- Microsoft Word (.docx)
- Microsoft Excel (.xlsx)
- Text (.txt)
- Read
- Edit (including cut, copy, and paste)
- Save changes to protected copy
- Keyavi apps
- Keyavi Web
- Read
- Edit (including cut, copy, and paste)
- Save unprotected copy
- Screen share
- Screen capture
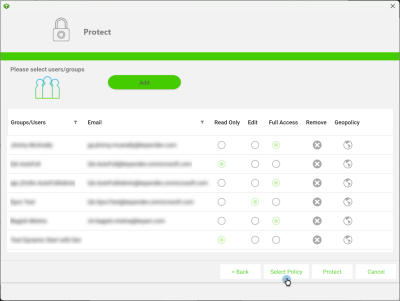
- Review the summary list of selected users and groups. From this page you can:
- Click Select Policy to add an access time frame or file-level geopolicy.
- Click the Geopolicy icon
 to add a geopolicy to the selected user.
 - Click Protect to save the file as a Keyavi-protected .IKD file with the applied policies.
If you are adding multiple users or groups, you can browse and search any combination. The app retains your selections until you click Done.
Individual user rights take precedence over rights determined through group membership.
|
Authorization Mode |
Description |
Keyavi Application |
File Type |
Permitted Action |
|---|---|---|---|---|
| Read-only | File opens |
All | Over 150 file types are supported. | Read |
| Edit | File opens in a protected view with limited editing capabilities. | Keyavi for Windows |
|
|
| Full Access | File opens in its native application. |
|
All file types. |
|
Add Access Time Frame
Add a restrictive access time frame—also called time embargo—to define when access to data begins and expires. For example, you can limit access to before and after a business meeting.
If you don't select a time embargo, access to the protected data doesn't expire and can be opened at any time (unless revoked). However, if an authorized user attempts to open the protected file outside of this time frame, they'll get an error. For more information, see Authorized Time Period.
To add an access time frame:
-
From the Protect page, click Select Policy.
-
In Access Begins, select the calendar icon (
 ) to set the earliest date and time the data becomes accessible to authorized users. Then click Close. The start date must be before the end date.
 -
In Access Ends, select the calendar icon (
) to set the expiration date and time the data becomes inaccessible to authorized users. Then click Close. The end date should be after the start date. -
When finished:
-
Click Back to return to the Protect page.
-
Add a file-level geopolicy.
-
Click Protect to save the file as a Keyavi .IKD file with the applied policies.
-
Add File-level Geopolicies
Geopolicies define from which physical locations authorized users and groups can access a file. Keyavi uses organization-level geopolicies![]() A policy type that restricts data access based on specified geographical limitations configured at the organization level and on payloads., which are controlled by the admin, and file-level policies that file owners can apply to individual files. If you create a file-level policy that conflicts with an organization policy, the organization-level policy supersedes it. For example, you cannot allow access to a file in Russia if it is included in the organization-level Excluded Locations.
A policy type that restricts data access based on specified geographical limitations configured at the organization level and on payloads., which are controlled by the admin, and file-level policies that file owners can apply to individual files. If you create a file-level policy that conflicts with an organization policy, the organization-level policy supersedes it. For example, you cannot allow access to a file in Russia if it is included in the organization-level Excluded Locations.
You can apply geopolicies to the entire file, or to specific authorized users of the file. You cannot add a geopolicy to an authorized group. These policies can be granular, specifying the country, state, zip code, or coordinates from where users can access the file.
Only the Keyavi app for Windows supports applying file-level geopolicies. If you're using another app, you can add file-level geopolicies on the Data Management screen of the Portal.
Add a Geopolicy to a File
To add geopolicy to a file:
-
From the Protect page, click Select Policy.
-
In the Geopolicies section, click the Add a geopolicy button
 .
. -
Define a location using one of these two methods:
-
Enter a city, address, or zip code in the Location search, and then select the matching location. Show me

The remaining fields populate with relevant details.
-
Using decimal degrees, enter the latitude and longitude coordinates Lat,Long. Show me

While the number of decimal places you use in the coordinates affects the precision of the geolocation protection, Keyavi checks only the first four digits of the user's location when evaluating access locations.
The remaining fields populate with the geolocation details for the entered coordinates.
-
-
In Location Name, enter a name to identify the location.
-
If you want this policy to apply to one user only, in User, select the user to apply the policy to.
-
Click Add Policy.
-
When finished:
-
Click Back to return to the Protect page.
-
Add another file-level geopolicy.
-
Add an access time frame.
-
Click Protect to save the file as a Keyavi .IKD file.
-
Add a Geopolicy to an Authorized User
To add geopolicy to a file's authorized user![]() A recipient with access to the secured data file. The data owner defines the authorized users.:
A recipient with access to the secured data file. The data owner defines the authorized users.:
-
From the Protect page, locate the user, and then click the Geopolicy icon
. -
Configure the geopolicy as described in Add a Geopolicy to a File.
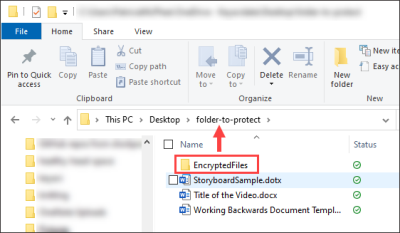
Protect Folders
You can protect all files within a folder. When you protect a folder, all files are encrypted individually and added to a new folder called EncryptedFiles inside the folder that you protected. On Mac, the Keyavi-protected IKD file![]() Short for "Intelligent Keyavi Data" and is the file extension for a Keyavi-protected file. This file has multiple layers of encryption and policy-based rulesets infused into the data itself, making it self-protecting, intelligent, and self-aware. is placed in the Downloads folder.
Any policies you apply to the folder apply to all files in it.
Short for "Intelligent Keyavi Data" and is the file extension for a Keyavi-protected file. This file has multiple layers of encryption and policy-based rulesets infused into the data itself, making it self-protecting, intelligent, and self-aware. is placed in the Downloads folder.
Any policies you apply to the folder apply to all files in it.
To protect a folder:
-
Open Keyavi , and then click Protect.
-
On the Protect window in Keyavi, click Select Folder, and then find the folder you want to protect.
-
Add user, groups, and other policies like you would for files.